Because the Revell/Monogram B-24 model is such an old kit the first thing that needed to be addressed were the raised panel lines. I have seen articles that advocate leaving them alone or removing them all together, but really the only way to address them is to remove them and rescribe the lines.
| |
Here are a few shots of the rescribing process and the finished results
    
I cut a template from styrene to engrave the lines on the vertical stabilizers.
   
|
|
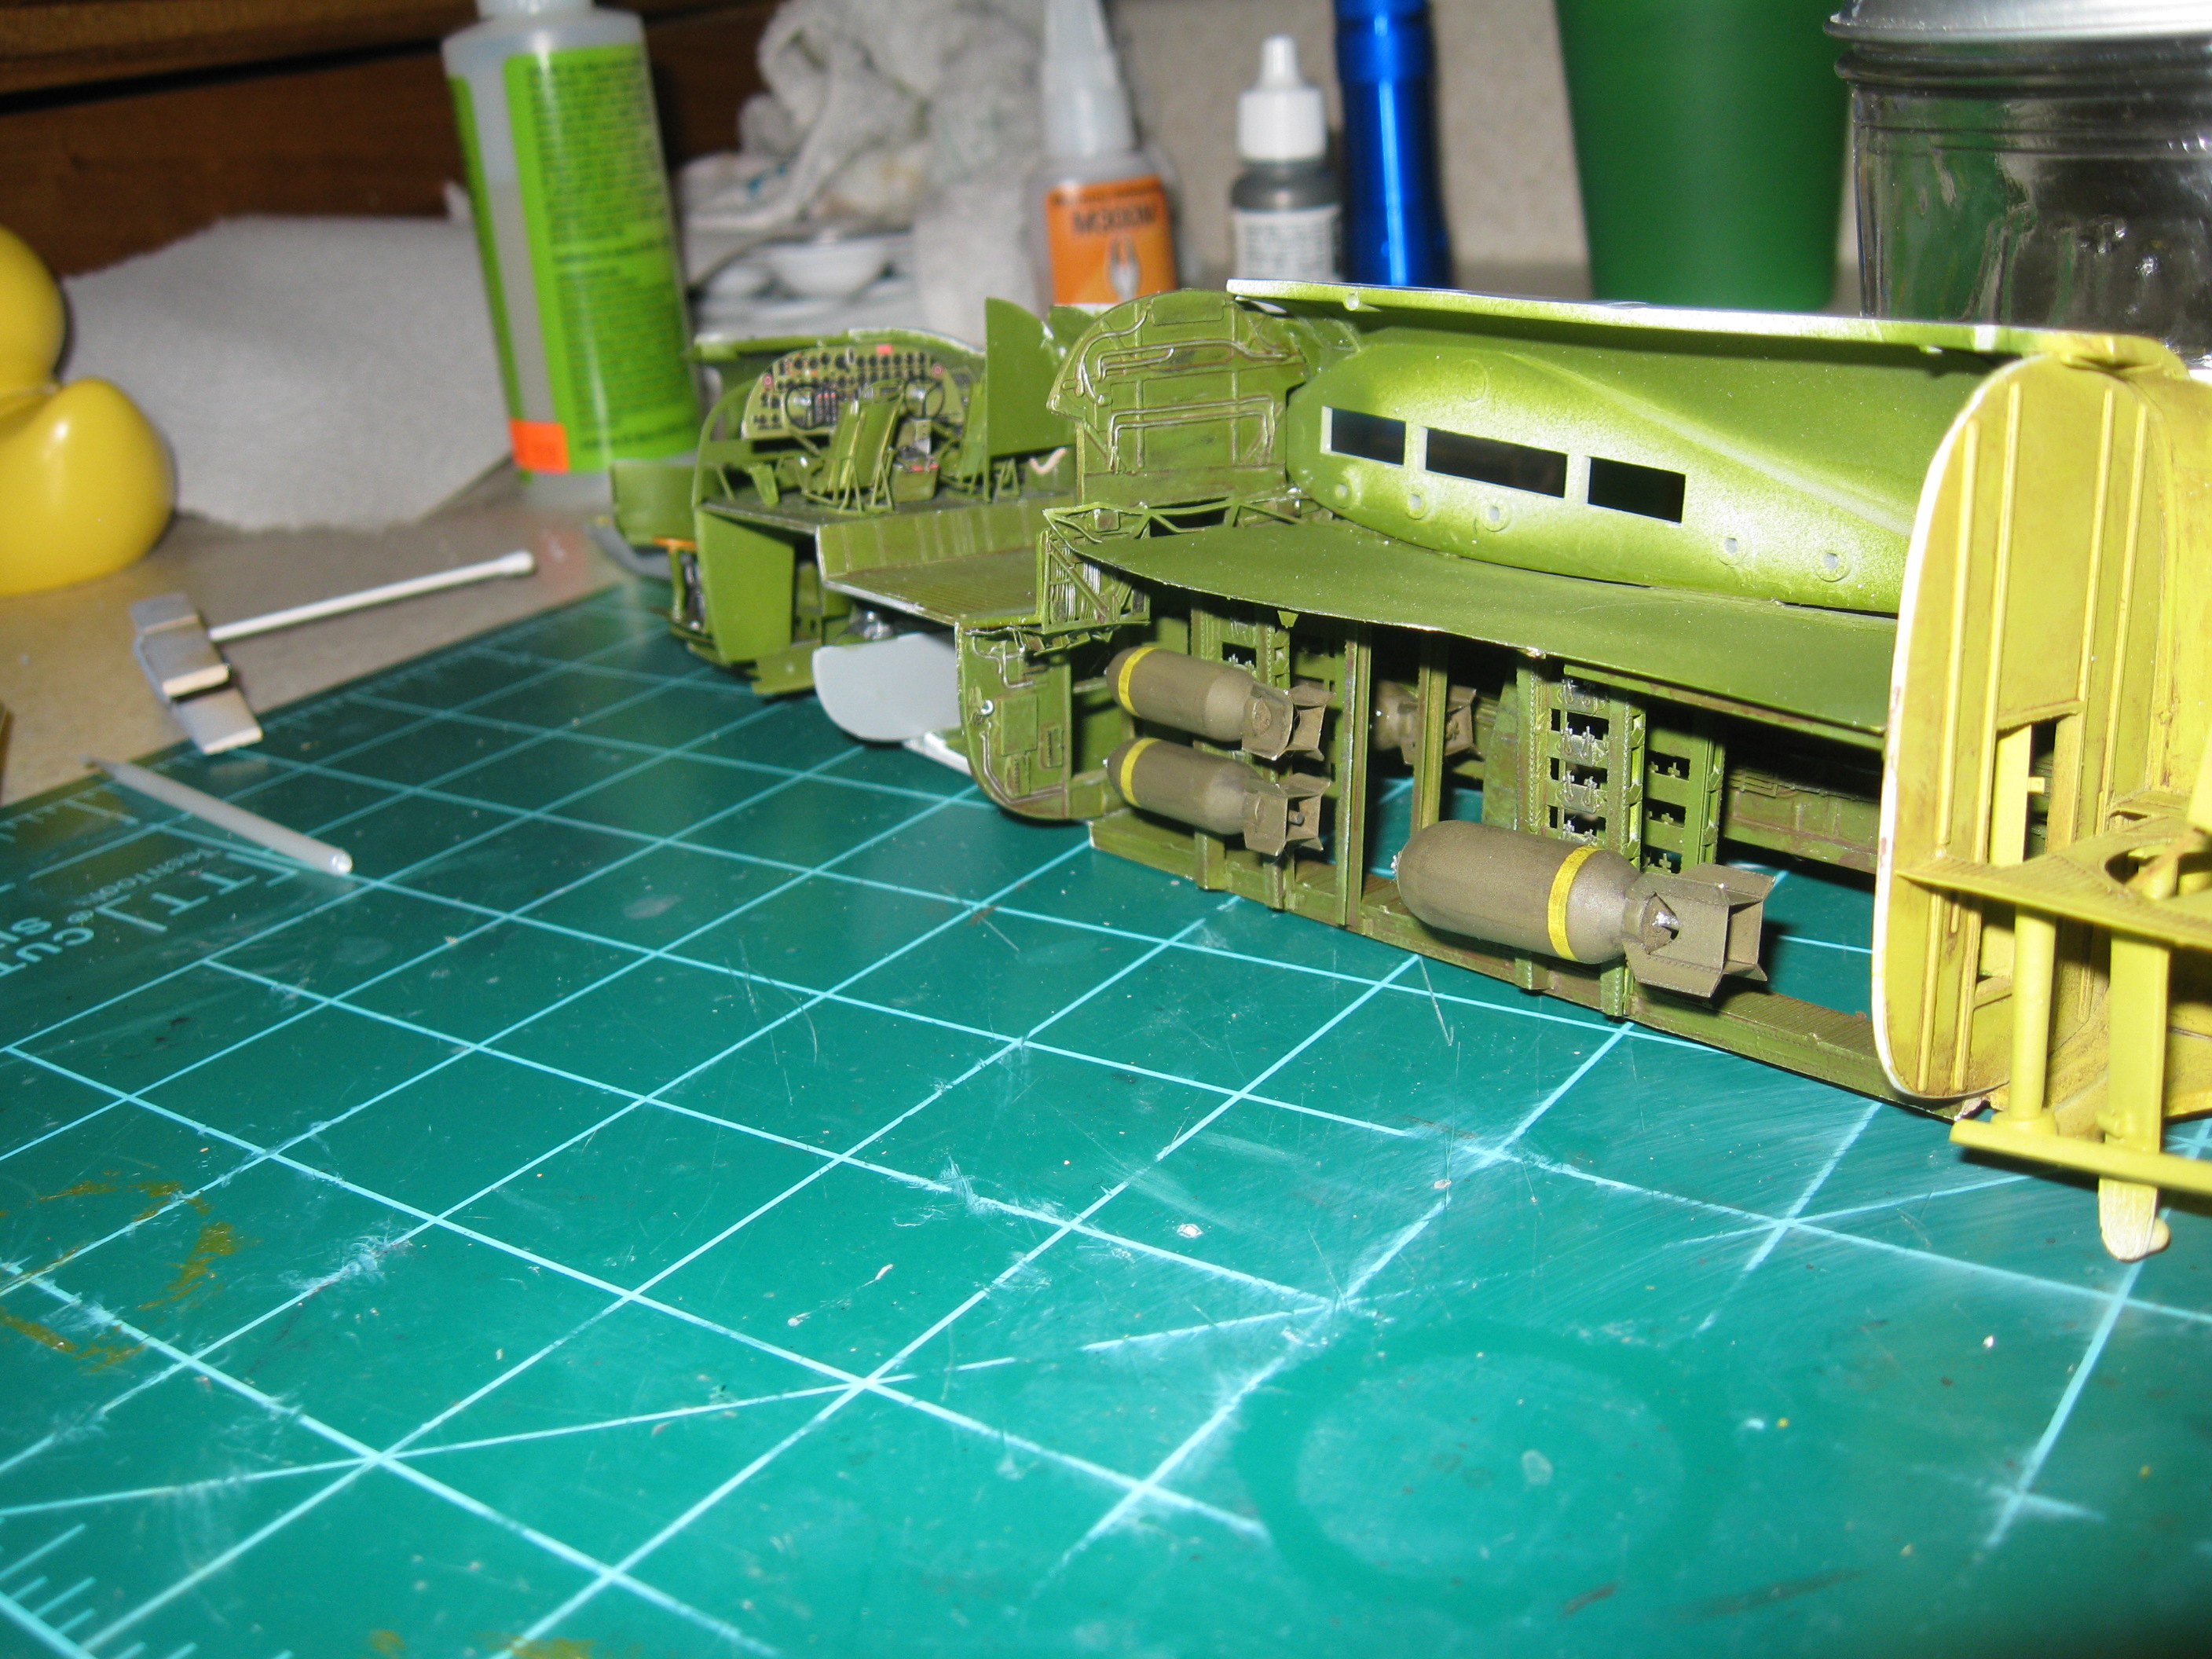
The next, most time consuming and intimidating step was the photoetch interior. This process stretched on for weeks and I am only ready for priming. There is much more to go in after the initial painting.
| |
One of the most agonizing things I have ever constructed in my life were the pilot seats. Talk about delicate. I will need to set the airbrush at about 0.0001PSI or they will fall apart.
    
    
Here are the installed details almost ready for a coat of primer


Replacing the fins on the bombs really improved them. Usually I don't like working on the ordinance but these will look great.
     |
|
The next thing I did should have been the first. With all the detail I have added I thought it would be a shame to only see it through the tiny and semi transparent windows. So I decided to make a few removable panels.
| |
Here is the fuselage taped together with the panels to be removed marked in red.

My thin razor saw was the perfect tool to use for cutting out the panels. The thin cut will greatly reduce the fairing necessary to get the panels to fit snuggly back in their locations. this is the section over the waist gunners.
 
And this is the section over the cockpit.
 
After removing the panel I drilled holes in each corner. I taped the bottom of the hole, dropped the magnet in and filled it with cyano. This was far more effective than the process I used for the gun panel on the Mustang.
   
I then used thin pieces of tin (because tin is ferrous) and made attachment points for the panels.
 
I then added strips of styrene to fair the panels and tested the fit. Once the wash is in the panel lines the gap that is left will hardly be noticeable.
  
  
|
|
The following pictures are of the interior in process and nearing completion. Check out the fantastic Eduard control pannel.
These are some of the detail parts.
| |
These are the ammo tracks, one not bent yet and the other ready to instal.

The Norden bomb sight. Surprisingly there was no help for this in the Eduard set.
 
And the seat for the bombadier. I used a different method for the wood grain than I used on the wais gunner ammo boxes. You can see them in the picture above. I like this method much better.
 
|
|
Here are more interior pictures with everything in place and ready to close up the fuselage.